
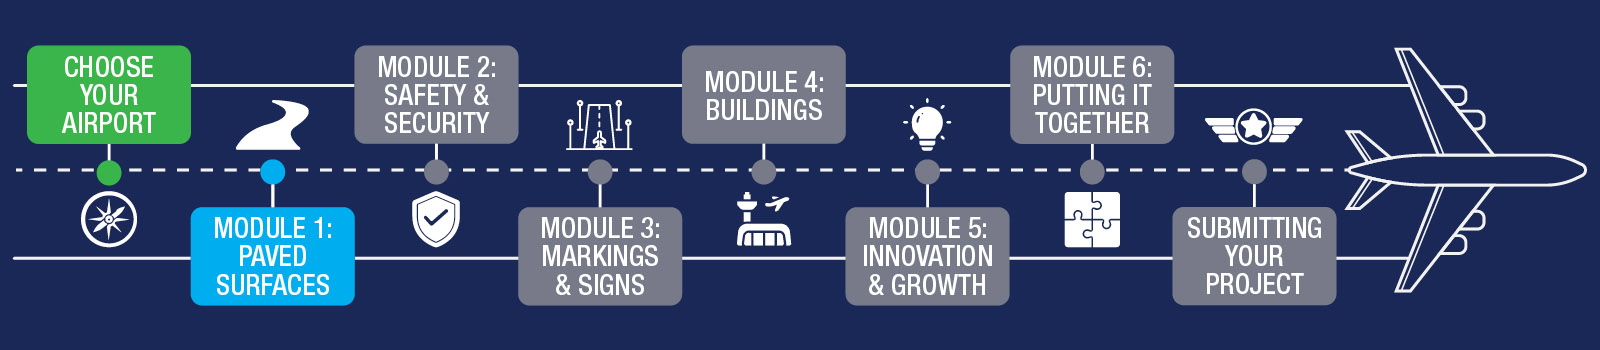
Airport Design Challenge (K-6): Module 1
Paved Surfaces
To start, look at where your runways and other paved roads go. Then, build them in Minecraft. This part can be tricky, so go slow and do your best! We recommend taking up to two weeks to set your scale and paved surfaces.
To learn about Paved Surfaces and what to look forward to during Module 1, watch this short video!

Before you start, download the Paved Surfaces Workbook (K-6). It has the Module 1 quiz and helps as you work on the lesson.
By the end of this module, you will finish:
- Airport Layout Plan (ALP) – Part 1
- Module 1 quiz (in the Paved Surfaces Workbook)
- Build your paved surfaces in Minecraft
As you build, refer to the information on this page and in the Paved Surfaces Workbook (K-6).
Are you ready to start your awesome airport? First, we need to lay down the roads for airplanes. These roads are called runways and taxiways, and they’re super important! It’s kind of like building the streets before you build the city.
You’ll also make big parking spaces for planes—those are called aprons. Be careful where you put them! If you don’t plan it right, you might have to move everything later.
Your airport might be big or small, and that’s okay! Just try to build everything the same size. A good trick is to think of 3 blocks as about the same as 9 feet. If it gets too big, you can make your airport a little smaller.
Let’s go, airport pros! You’ve got this!
One question many students ask is how to pick a scale for building their airport. Some airports are very large, and placing enough blocks for every surface can be hard.
You can pick any scale that you want. Here are a couple of options:
- Larger scale or a bigger final airport: 1 block represents 3 feet (1 block per 3 feet)
- Smaller scale or a smaller final airport: 1 block represents 9 feet (1 block per 9 feet)
No matter what scale you pick, the most important rule is to use it for your whole airport.
Tip: As you build, you may find out that your airport is bigger than you thought. If you want to change to a smaller airport, you might be able to reuse parts of your existing design. Try to decide early so you can focus your efforts on finishing your project.

When you signed up for this challenge, you picked an airport near your home. Now it’s time to pick the perfect spot to build it in Minecraft!
First, make a map that looks like the place around your house - draw or build where you live. Then, find the best flat spot for your airport to go.
Things to think about:
- How big is your airport? Check how long and wide your runway needs to be. You’ll need lots of space for runways, taxiways, roads, and buildings!
- Stay away from big hills, tall buildings, or rivers that might be in the way.
- Get creative! Add trees, hills, rivers, or even a farm with a barn and animals. You get points for good design and creativity!
Once you find the best spot, you’re ready to start building!
You’ve probably heard of a runway, but what about taxiways and aprons? These are all parts of an airport where planes drive and park.
- Runway: Where planes take off and land.
- Taxiway: The road that planes drive on to get to the runway.
- Apron: Where planes park to load people or fuel up.
Things to think about:
- Not all roads are the same! Some are concrete, some are asphalt, and some might be gravel. Airports are like that, too! Use different blocks in Minecraft to show the different surfaces.
- Each Minecraft block is about 3 feet long in real life. So, check how long your runway really is and build it the right size.
- Big airports take a LOT of time to build. If you picked a huge airport but it’s too big, it’s okay to pick a smaller one instead. Just ask an FAA mentor for help if you want to switch!
Keep building and have fun - you’re doing great!
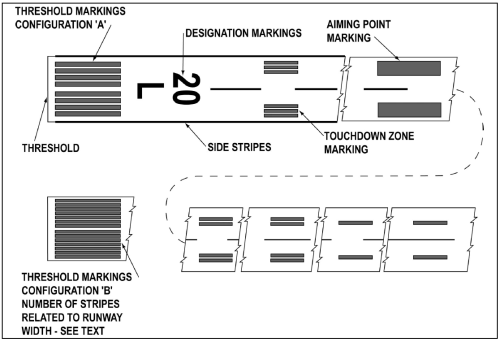
FAA's From the Flight Deck video series shows real runway approaches and taxi operations using cockpit-mounted cameras, along with diagrams that highlight hot spots and other safety-sensitive areas.
Watch this example video featuring Daytona Beach International Airport (DAB) in Daytona Beach, Florida.
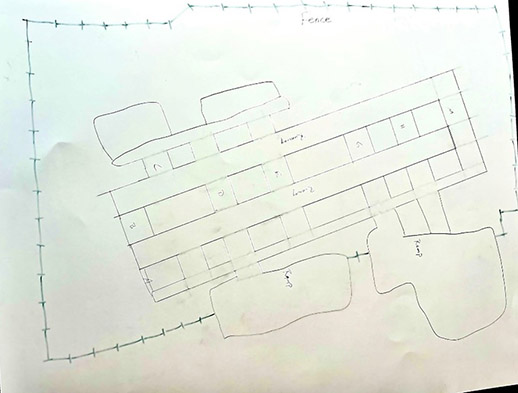
As you build your airport, it is very important that you understand how the major components go together. Professional airport planners use a series of documents and charts called an Airport Layout Plan (ALP).
In each module, you will work with your team to create a hand-drawn ALP. Begin your ALP by drawing all of the paved surfaces from your airport. Send us a photo of your drawing once it is complete.
When your drawing is complete, take a clear photo and email it to avsed.challenge@faa.gov. Include your name (or team name) and the airport you selected in the subject line.
Example:
- Airport Site Selection (Britannica): Background reading on selecting an airport site (may require adult support).
- Airport Master Record (Form 5010): Find runway dimensions, materials, and airport contact information.
- Meet Navneet Garg: Airport Pavement (Video): Overview of airport pavement engineering.
- Airport Pavements (Video): Differences between highway and airport pavements (FAA specs).
- FAA Resources for Students: Explore aviation and aerospace careers and activities.
- Google Earth & Google Maps: Helpful for aerial views and understanding airport layout.
And here are your wings for completing Module 1!
Finished with your Workbook and ready to move on? Next up is Module 2 – Safety & Security!